SnapiDesk - Quick Start Guide
Step 1: Open Extension and Sign In
First, open the SnapiDesk Chrome extension and sign in using your Google account. Please wait for the QR code to generate.
 (Image: Placeholder for SnapiDesk extension open with Google sign-in and QR code generating)
Step 2: Scan QR Code and Open URL
Scan the generated QR code from your phone's camera. Your phone will recognize the QR code and provide a URL. Click on this URL.
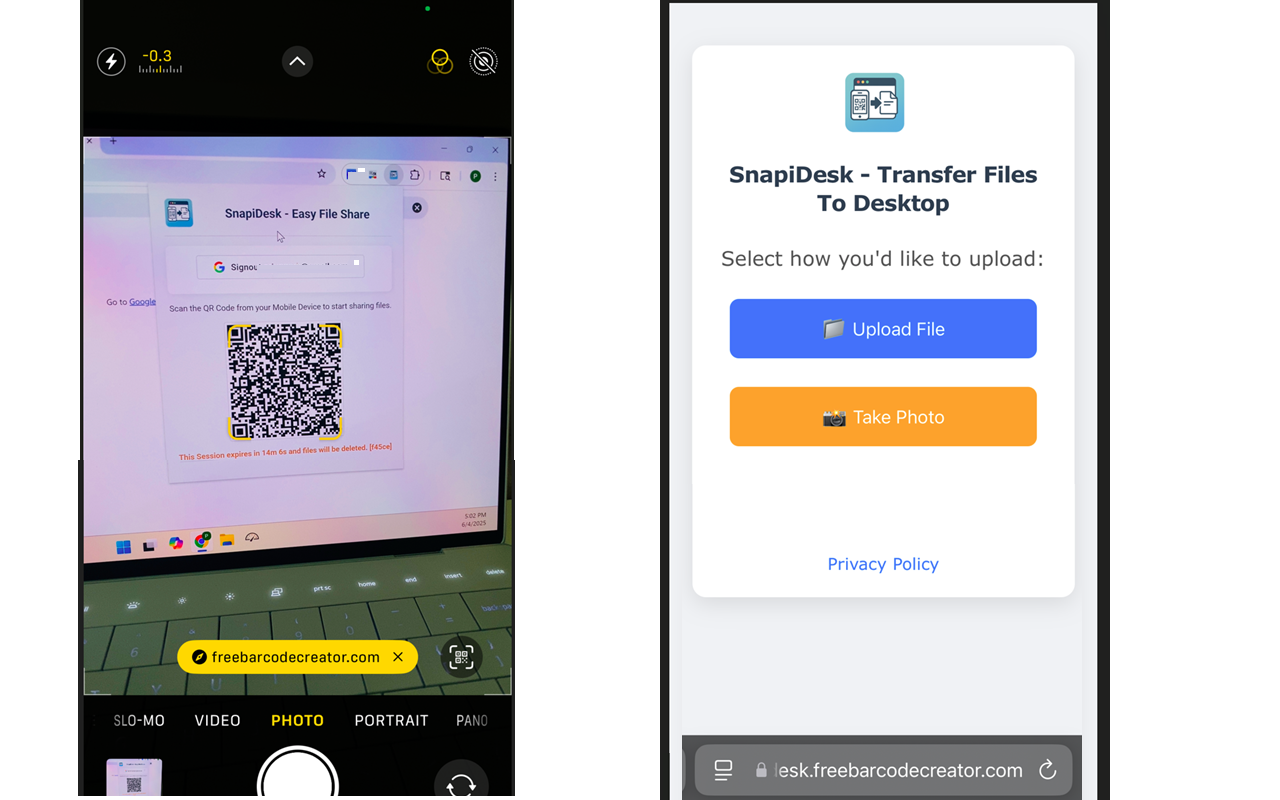 (Image: Placeholder for phone scanning QR code and displaying URL link)
Step 3: Upload from Mobile Device
After clicking the URL, you will be directed to a page on your mobile device. From here, you can either take a new photo or upload an existing file from your mobile device's gallery.
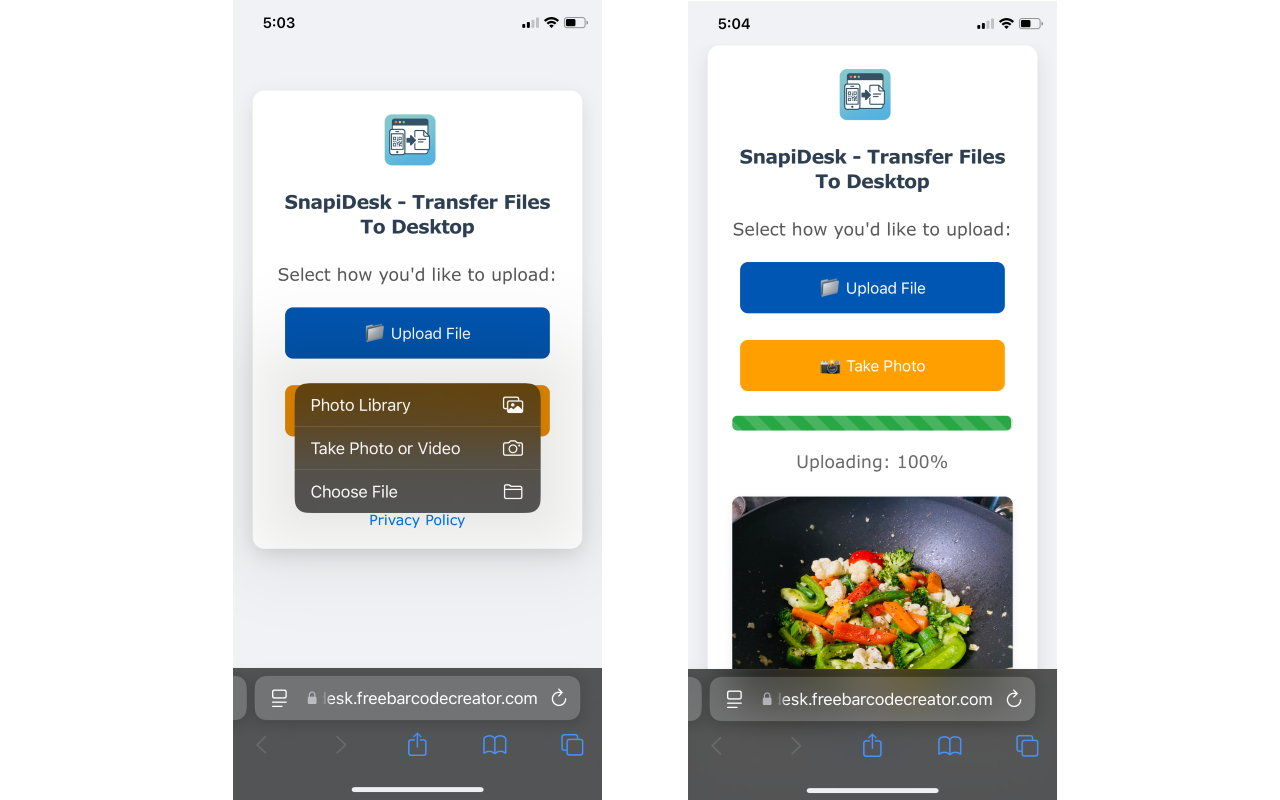 (Image: Placeholder for mobile device screen showing options to take photo or upload file)
Step 4: Check Chrome Extension for Uploaded Files
Once you've uploaded a file from your mobile device, check the SnapiDesk Chrome extension. Your uploaded files should now appear there. You can continue uploading more files from your mobile device as needed.
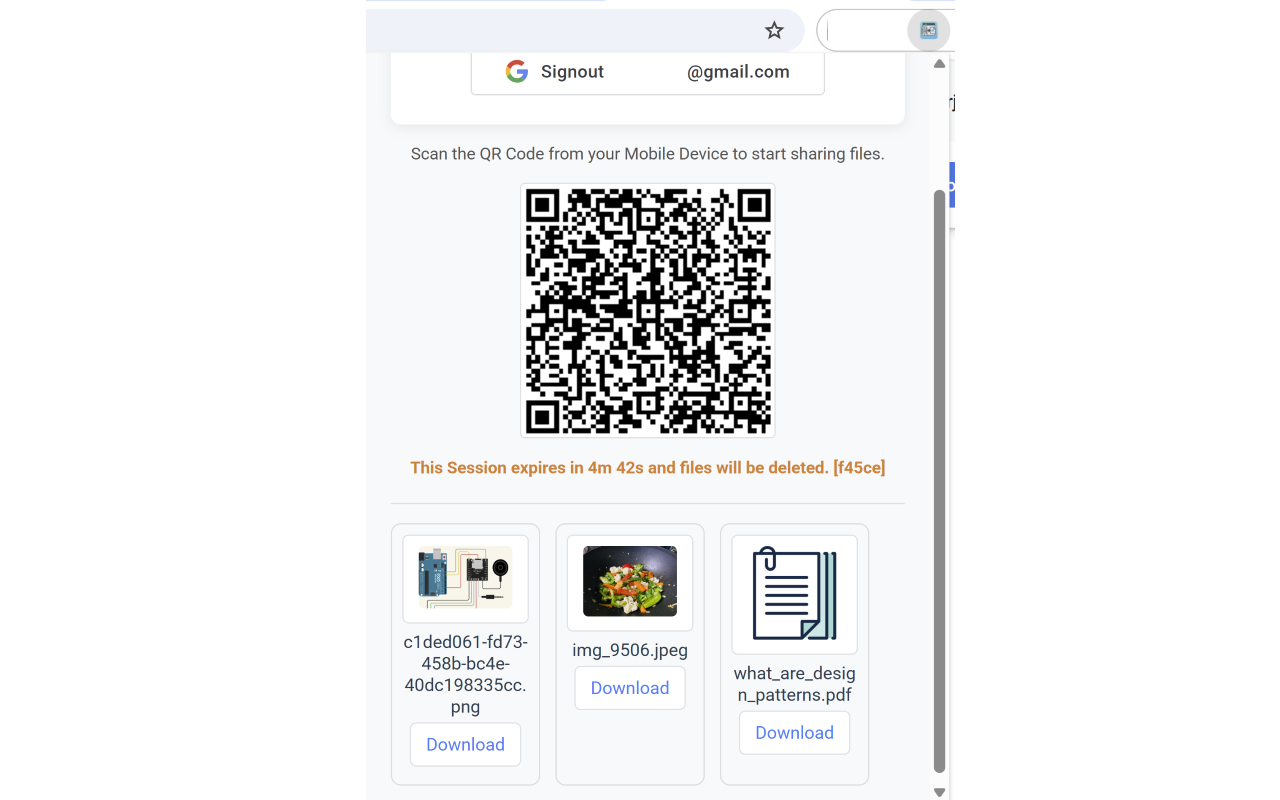 (Image: Placeholder for SnapiDesk Chrome extension showing a list of recently uploaded files)
Note:
Please note that uploaded files are automatically deleted after 15 minutes.
For any issues or support, please contact support@freebarcodecreator.com